Godot 4.3 Basics
In VSC let’s make a new folder in our root directory called Scripts, and then make a new file inside the Sripts folder called main.gd. Once this is made we will go into the Godot Engine and drag and drop the newly made file into the main scenes script found on the right side
Extends keyword
To know what to extend, match your script to the type of node it’s attached to or the functionality you need. In the case of the main.tscn because we made a Node2D to start, we will extend Node2D.
- For basic functionality like general logic or managing other nodes, extend
NodeorNode2D - For UI elements, extend from the UI category,
Button,Label,Control. - For physics and movement, extend
KinematicBody2D,RigidBody2D, orArea2Ddepending on whether you’re controlling, simulating, or detecting. - For visuals, extend nodes like
Sprite2Dfor images orAnimationPlayerfor animations.
We can think of extending like choosing a base template.
_Init() or _ready()
Before getting into the code, we need a place to start. Every Godot game, begins with core functions that serve as entry points to the games main loop. Godot script runs within the engine’s scene tree, and the primary functions that every game starts with are:
_init()(Constructor) – This function is called immediately when an instance of a script is created before it becomes part of the scene tree. This is useful for setting default values or initializing variables that don’t depend on the node being loaded into the scene.
extends Node

var health: int
var name: String

# Constructor
func _init():
    health = 100
    name = "Player"
    print("Character created with", health, "HP and name:", name)
_ready()– This function runs once when the node enters the scene tree. It’s typically where you initialize references, set up signals, or prepare anything that requires access to the game world. If a script is attached to a node,_ready()ensures that all child nodes are available before execution.
extends Node

var label: Label

# Runs when the node is added to the scene tree
func _ready():
    label = $Label  # Finds a child node called "Label"
    label.text = "Game Started!"
    print("Label text set:", label.text)
In this example, _ready() is used to find a child node and modify it. This would fail in _init() because child nodes aren’t available until the script enters the scene tree.
Hello World
To create “Hello World” in Godot, we’ll use the _init() function since it runs immediately when the script instance is created:
extends Node2D

func _init():
    print("Hello, World!")
When you run the scene, “Hello, World!” will appear in the output console.
Understand the diference
To understand the difference between _init() and _ready(), let’s look at this example
extends Node2D

func _init():
    print("I always come first")

func _ready():
    print("I get processed next")
When you run this script, the console will output:
I always come first
I get processed next
Remember, here, _init() runs first because it’s called when the script instance is created. _ready() follows after the node enters the scene tree, making it useful for setup that depends on other nodes or the scene being fully initialized.
Variables and Basic Data Types
Now that we’ve covered _init() and _ready(), let’s introduce variables. A variable stores information that we may want to access later. In most languages, variables can store different data types like integers, floats, strings, booleans, arrays, objects and many more.
Declaring a Variable
In Godot, we use var to create a variable. use a comma or plus sign to append the variable to your string. Here’s an example:
extends Node2D

var player_name = "Royal Chicken"
var player_level = 20

func _init():
	print("Player name (lv): ", player_name," (",player_level,")")
	print("Player name (lv): " + player_name," (",player_level,")")
When we run this script, the console will output:
Player name (lv): Royal Chicken (20)
Player name (lv): Royal Chicken (20)
Changing Variables
Variables can be updated anytime. Let’s modify our level inside _ready():
extends Node2D

var player_name = "Royal Chicken"
var player_level = 20

func _init():
	print("Player name (lv): ", player_name," (",player_level,")")

func _ready():
	player_level += 1
	print("Congratulations, ", player_name, " has leveled up to ", player_level, "!")
This will print:
Player name (lv): Royal Chicken (20)
Congratulations, Royal Chicken has leveled up to 21!
Since _ready() runs after _init(), we can see how values change during execution.
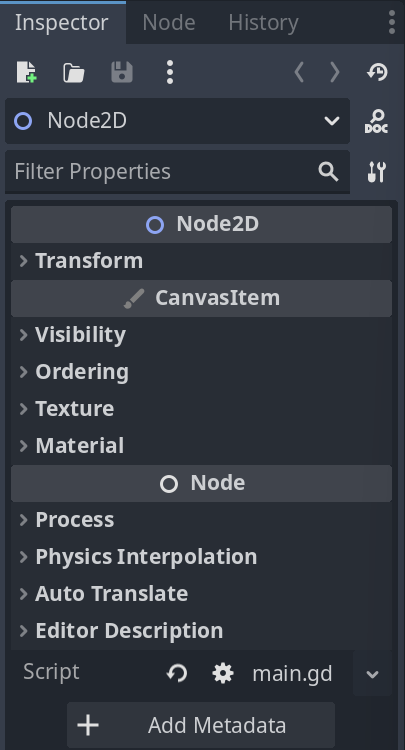
Node Properties
Every node has properties that define how it looks and behaves. Since we’re working in VSC (Visual Studio Code), we can’t see these properties in the Godot Inspector, so we’ll use get_property_list() to list all editable properties in a node.
extends Node2D

func _init():
    print(get_property_list())
Running this will print a large list of properties and their details in a JSON-like format. While useful, this output can be overwhelming, so let’s break it down.
What Does get_property_list() Do?
get_property_list() returns a list (also called an array) where each item is a dictionary . A dictionary is a type of data structure that stores key-value pairs —meaning each property has a name and some associated information.
Here’s what one of these dictionaries looks like:
`{ "name": "position", "type": 5 } `
This means:
"name"→ Stores the property name , like"position"."type"→ Stores the data type of the property, represented as a number .
Since get_property_list() returns many of these dictionaries (one for each property of the node), we need a loop to go through them one at a time.
Making It Readable
Before we clean up the data from get_property_list(), we need to learn about loops.
Right now, get_property_list() gives us a huge list of properties, and if we just print it out directly, it’s overwhelming. Instead of looking at all that raw data, we can loop through itand extract only the useful parts.
What is a For Loop?
A for loop repeats a block of code for each item in a list. This is useful when we have multiple things to process, like our list of node properties .
The general structure of a for loop in Godot looks like this:
for variable in list:
    # Code to run for each item in the list
variable→ This stores the current item from the list as the loop runs.list→ This is the collection of items that we’re looping through.- The loop will repeat once for each item in the list.
How the Loop Woks in GDScript
When we call get_property_list(), it returns a long list of dictionaries, each containing details about a property in the node. Instead of trying to read through all that data at once, we use a for loop to go through each property one at a time.
In this script, we start by storing the full list in a variable called properties. Then, the for loop picks one dictionary at a time from the list and assigns it to prop. Since each prop is a dictionary, we can access its "name" key to get the property’s name and "type" key to see what kind of data it holds. The print() statement then formats this into a readable output, making it much easier to see the available properties and their types.
extends Node2D

func _ready():
    var properties = get_property_list()  # Get a list of all properties in this node

    for prop in properties:  # Loop through each property
        print(prop.name, " - Type: ", prop.type)  # Print the name and type
This method allows us to efficiently process and display only the useful information from get_property_list() instead of dealing with an overwhelming block of raw data.
Understanding Data Types
The type number corresponds to specific data types in Godot. Here’s the full list of all 20 data types :
- 0 → Nil (Represents no value)
- 1 → bool (true/false)
- 2 → int (whole numbers)
- 3 → float (decimal numbers)
- 4 → String (text)
- 5 → Vector2 (X, Y positions for 2D nodes)
- 6 → Vector2i (X, Y integer positions for 2D nodes)
- 7 → Rect2 (A 2D rectangle with position and size)
- 8 → Rect2i (A 2D rectangle with integer position and size)
- 9 → Vector3 (X, Y, Z positions for 3D nodes)
- 10 → Vector3i (X, Y, Z integer positions for 3D nodes)
- 11 → Transform2D (A transformation matrix for 2D nodes)
- 12 → Vector4 (A four-component vector)
- 13 → Vector4i (A four-component integer vector)
- 14 → Plane (A mathematical plane in 3D space)
- 15 → Quat (Quaternion for 3D rotation)
- 16 → AABB (3D bounding box)
- 17 → Basis (3D transformation matrix)
- 18 → Transform3D (Full 3D transformation data)
- 19 → Projection (4×4 matrix used for 3D projections)
- 20 → Color (RGBA values for colors)
- 21 → StringName (Optimized internal string representation)
- 22 → NodePath (A reference to another node in the scene)
- 23 → RID (Resource ID, used for low-level access)
- 24 → Object (A general object reference)
- 25 → Callable (A function reference)
- 26 → Signal (A signal used for event handling)
- 27 → Dictionary (Key-value pairs, similar to JSON objects)
- 28 → Array (A list of values)
- 29 → PackedByteArray (Optimized array for storing bytes)
- 30 → PackedInt32Array (Optimized array for storing 32-bit integers)
- 31 → PackedInt64Array (Optimized array for storing 64-bit integers)
- 32 → PackedFloat32Array (Optimized array for storing 32-bit floats)
- 33 → PackedFloat64Array (Optimized array for storing 64-bit floats)
- 34 → PackedStringArray (Optimized array for storing strings)
- 35 → PackedVector2Array (Optimized array for storing Vector2 elements)
- 36 → PackedVector3Array (Optimized array for storing Vector3 elements)
- 37 → PackedColorArray (Optimized array for storing Color elements)
Conditionals for Cleaning Up Property Types
Now that we understand loops and how to extract property names and types from get_property_list(), we can take it a step further by using conditionals to replace the type number with a more human-readable name.
Step 1: Understand the Problem
Right now, when we print properties, we see something like this:
position - Type: 5
rotation - Type: 3
visible - Type: 1
modulate - Type: 20
The type numbers don’t mean much unless you memorize them. Instead, we want it to look like this:
position - Type: Vector2
rotation - Type: float
visible - Type: bool
modulate - Type: Color
To achieve this, we need to convert these numbers into their actual data type names using conditionals.
Step 2: Introducing Conditionals
A conditional statement lets us check if a value matches a certain condition and then execute code based on that.
A basic example:
var type_number = 1

if type_number == 0:
    print("Nil")
elif type_number == 1:
    print("Boolean")
else:
    print("Unknown type")
If type_number is 1, this will print "Boolean". This is the same logic we’ll use to clean up prop.type.
Step 3: Applying Conditionals to Our Loop
Now we modify our script to replace type numbers with readable text .
extends Node2D

func _ready():
    var properties = get_property_list()

    for prop in properties:
        var type_name = ""  # Placeholder for the readable type

        if prop.type == 0:
            type_name = "Nil"
        elif prop.type == 1:
            type_name = "bool"
        elif prop.type == 2:
            type_name = "int"
        elif prop.type == 3:
            type_name = "float"
        elif prop.type == 4:
            type_name = "String"
        elif prop.type == 5:
            type_name = "Vector2"
        elif prop.type == 6:
            type_name = "Rect2"
        elif prop.type == 7:
            type_name = "Vector3"
        elif prop.type == 8:
            type_name = "Transform2D"
        elif prop.type == 10:
            type_name = "Quat"
        elif prop.type == 11:
            type_name = "AABB"
        elif prop.type == 12:
            type_name = "Basis"
        elif prop.type == 13:
            type_name = "Transform"
        elif prop.type == 14:
            type_name = "Color"
        elif prop.type == 18:
            type_name = "Dictionary"
        elif prop.type == 19:
            type_name = "Array"
        else:
            type_name = "Unknown"  # Default if type isn't in our list

        print(prop.name, " - Type: ", type_name)
Now, instead of seeing numbers, we get a readable output.
position - Type: 5
rotation - Type: 3
visible - Type: 1
modulate - Type: 20
Step 4: Making It More Efficient
While this works, it’s a bit long and repetitive. A better way is to use a dictionary or match statement to make the code cleaner.
extends Node2D

func _ready():
	var properties = get_property_list()

	var type_lookup = {
		0: "Nil", 1: "bool", 2: "int", 3: "float", 4: "String", 5: "Vector2", 6: "Vector2i",
		7: "Rect2", 8: "Rect2i", 9: "Vector3", 10: "Vector3i", 11: "Transform2D", 12: "Vector4",
		13: "Vector4i", 14: "Plane", 15: "Quat", 16: "AABB", 17: "Basis", 18: "Transform3D",
		19: "Projection", 20: "Color", 21: "StringName", 22: "NodePath", 23: "RID", 24: "Object",
		25: "Callable", 26: "Signal", 27: "Dictionary", 28: "Array", 29: "PackedByteArray",
		30: "PackedInt32Array", 31: "PackedInt64Array", 32: "PackedFloat32Array", 33: "PackedFloat64Array",
		34: "PackedStringArray", 35: "PackedVector2Array", 36: "PackedVector3Array", 37: "PackedColorArray"
	}


	for prop in properties:
		var type_name = type_lookup.get(prop.type, "Unknown")
		print(prop.name, " - Type: ", type_name)
This does the exact same thing , but cleaner and easier to update .
Node - Type: Nil
_import_path - Type: Unknown
name - Type: Unknown
unique_name_in_owner - Type: bool
Grouping Data Types for Better Readability
Now that we have a full list of data types, let’s organize them into groups so that when we print out properties, they aren’t all mixed together.
Why Group Properties?
Now that we’ve learned how to retrieve and print node properties, we’re taking it a step further by grouping similar properties together. This will make our output more structured and readable rather than having everything mixed together.
Right now, when we print properties, they appear in a random order, making it difficult to spot patterns. Instead of this:
position - Type: Vector2
visible - Type: bool
rotation - Type: float
modulate - Type: Color
children - Type: Array
We want organized groups like this:
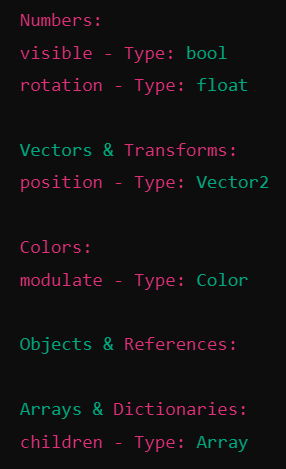
By grouping properties by type , we make it much easier to understand what each property does.
Step 1: Understanding Lists in GDScript
A list (also called an array ) stores multiple values. We use them to group properties of the same type.
Example:
var numbers = []  # Empty list for number-based properties
var colors = []   # Empty list for color-based properties

numbers.append("visible - Type: bool")  # Adding an entry to the list
colors.append("modulate - Type: Color")  # Adding a color-related entry
Now, numbers and colors contain:
[“visible - Type: bool”]
[“modulate - Type: Color”]
Step 2: Using Conditionals to Classify Properties
To decide which list a property should go into, we use conditionals (if-elif statements).
Example:
if prop.type == 1:
    numbers.append(prop.name + " - Type: bool")  # Adds to the numbers list
elif prop.type == 20:
    colors.append(prop.name + " - Type: Color")  # Adds to the colors list
Step 3: Full Script for Grouping Properties
Here’s our fully structured script that retrieves properties, groups them , and prints them separately .
extends Node2D

func _ready():
	var properties = get_property_list()

	var numbers = []
	var strings = []
	var bools = []
	var vectors = []
	var colors = []
	var objects = []
	var arrays = []
	var nil = []

	var type_lookup = {
		0: "Nil", 1: "bool", 2: "int", 3: "float", 4: "String", 5: "Vector2", 6: "Vector2i",
		7: "Rect2", 8: "Rect2i", 9: "Vector3", 10: "Vector3i", 11: "Transform2D", 12: "Vector4",
		13: "Vector4i", 14: "Plane", 15: "Quat", 16: "AABB", 17: "Basis", 18: "Transform3D",
		19: "Projection", 20: "Color", 21: "StringName", 22: "NodePath", 23: "RID", 24: "Object",
		25: "Callable", 26: "Signal", 27: "Dictionary", 28: "Array", 29: "PackedByteArray",
		30: "PackedInt32Array", 31: "PackedInt64Array", 32: "PackedFloat32Array", 33: "PackedFloat64Array",
		34: "PackedStringArray", 35: "PackedVector2Array", 36: "PackedVector3Array", 37: "PackedColorArray"
	}


	for prop in properties:
		var type_name = type_lookup.get(prop.type, "Unknown")

		if prop.type in [1]:
			bools.append(prop.name + " - Type: " + type_name)
		elif prop.type in [2, 3]:  # bool, int, float
			numbers.append(prop.name + " - Type: " + type_name)
		elif prop.type in [4, 21]:
			strings.append(prop.name + " - Type: " + type_name)
		elif prop.type in [5, 6, 7, 8, 9, 10, 11, 12, 13, 14, 15, 16, 17, 18, 19]:  # Vector types & transforms
			vectors.append(prop.name + " - Type: " + type_name)
		elif prop.type in [20]:  # Colors
			colors.append(prop.name + " - Type: " + type_name)
		elif prop.type in [22, 23, 24, 25, 26]:  # Node and object references
			objects.append(prop.name + " - Type: " + type_name)
		elif prop.type in [27, 28, 29, 30, 31, 32, 33, 34, 35, 36, 37]:  # Arrays and dictionaries
			arrays.append(prop.name + " - Type: " + type_name)
		else:
			nil.append(prop.name + " - Type: " + type_name)


	print("Numbers:")
	for entry in numbers:
		print(entry)

	print("\nStrings:")
	for entry in strings:
		print(entry)

	print("\nBools:")
	for entry in bools:
		print(entry)

	print("\nVectors:")
	for entry in vectors:
		print(entry)

	print("\nColors")
	for entry in colors:
		print(entry)

	print("\nObjects:")
	for entry in objects:
		print(entry)

	print("\nArrays:")
	for entry in arrays:
		print(entry)

	print("\nNil")
	for entry in nil:
		print(entry)
This will produce:
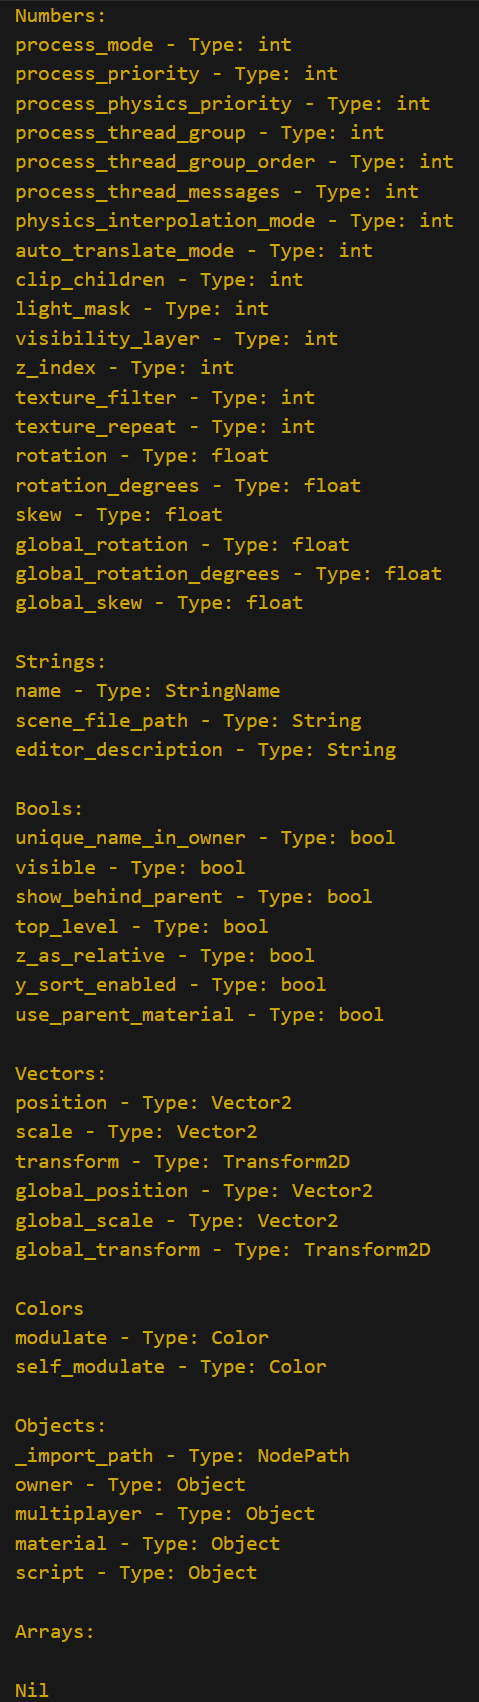
Introducing Functions for Modularity and Object-Oriented Design
Now that we have successfully organized node properties into groups , it’s time to refactor our code using functions to improve modularity and reusability. Right now, all our logic sits inside _ready(), which means:
- The code cannot be reused elsewhere – We can only check properties for the current node (
self). - If we need to check another object’s properties , we would have to duplicate the entire script .
- The script assumes every object is a Node – This will cause errors when passing other object types like
ColororVector2.
To fix these issues , we will:
- Create a function that categorizes properties.
- Pass objects into this function so we can check any class, not just
Node2D. - Prevent errors by handling different object types correctly.
What is a Function?
A function is a reusable block of code that performs a specific task. Instead of copy-pasting code , we define a function once and call it whenever we need it .
Example:
func say_hello():
    print("Hello, world!")

say_hello()  # Prints: Hello, world!
Step 1: Creating a Function to Categorize Properties
Instead of hardcoding everything inside _ready(), we move the logic into a function:
extends Node2D

func _ready():
    get_obj_properties(self)  # Call function for the current node

func get_obj_properties(obj):
	var properties = obj.get_property_list()

	var numbers = []
	var strings = []
	var bools = []
	var vectors = []
	var colors = []
	var objects = []
	var arrays = []
	var nil = []

	var type_lookup = {
		0: "Nil", 1: "bool", 2: "int", 3: "float", 4: "String", 5: "Vector2", 6: "Vector2i",
		7: "Rect2", 8: "Rect2i", 9: "Vector3", 10: "Vector3i", 11: "Transform2D", 12: "Vector4",
		13: "Vector4i", 14: "Plane", 15: "Quat", 16: "AABB", 17: "Basis", 18: "Transform3D",
		19: "Projection", 20: "Color", 21: "StringName", 22: "NodePath", 23: "RID", 24: "Object",
		25: "Callable", 26: "Signal", 27: "Dictionary", 28: "Array", 29: "PackedByteArray",
		30: "PackedInt32Array", 31: "PackedInt64Array", 32: "PackedFloat32Array", 33: "PackedFloat64Array",
		34: "PackedStringArray", 35: "PackedVector2Array", 36: "PackedVector3Array", 37: "PackedColorArray"
	}


	for prop in properties:
		var type_name = type_lookup.get(prop.type, "Unknown")

		if prop.type in [1]:
			bools.append(prop.name + " - Type: " + type_name)
		elif prop.type in [2, 3]:  # bool, int, float
			numbers.append(prop.name + " - Type: " + type_name)
		elif prop.type in [4, 21]:
			strings.append(prop.name + " - Type: " + type_name)
		elif prop.type in [5, 6, 7, 8, 9, 10, 11, 12, 13, 14, 15, 16, 17, 18, 19]:  # Vector types & transforms
			vectors.append(prop.name + " - Type: " + type_name)
		elif prop.type in [20]:  # Colors
			colors.append(prop.name + " - Type: " + type_name)
		elif prop.type in [22, 23, 24, 25, 26]:  # Node and object references
			objects.append(prop.name + " - Type: " + type_name)
		elif prop.type in [27, 28, 29, 30, 31, 32, 33, 34, 35, 36, 37]:  # Arrays and dictionaries
			arrays.append(prop.name + " - Type: " + type_name)
		else:
			nil.append(prop.name + " - Type: " + type_name)


	print("Numbers:")
	for entry in numbers:
		print(entry)

	print("\nStrings:")
	for entry in strings:
		print(entry)

	print("\nBools:")
	for entry in bools:
		print(entry)

	print("\nVectors:")
	for entry in vectors:
		print(entry)

	print("\nColors")
	for entry in colors:
		print(entry)

	print("\nObjects:")
	for entry in objects:
		print(entry)

	print("\nArrays:")
	for entry in arrays:
		print(entry)

	print("\nNil")
	for entry in nil:
		print(entry)
Now, if we have another object , we can call:
var my_sprite = Sprite2D.new()
categorize_properties(my_sprite)  # Works on Sprite2D too!
This removes duplicate code and makes the function work on any node.
Step 2: Handling Non-Node Objects
The Problem: What Happens If We Pass a Non-Node?
So far, our function assumes every object has get_property_list() , which only exists in Nodes .
Let’s try calling:
categorize_properties(Color(1, 0, 0, 1))
categorize_properties(Vector2(100, 200))
categorize_properties(5)
These will break , because Color, Vector2, and int do not have get_property_list() .
Common Errors You’ll Encounter
If we try:
func _ready():
    categorize_properties(Color(1, 0, 0, 1))  # A red color
We get an error like:
Invalid call. Nonexistent function ‘get_property_list’ in base ‘Color’.
Why?
- Color objects do not have properties like Nodes.
- Only Nodes have
get_property_list().
Step 3: Checking the Object Type Before Using It
To prevent errors, we use type checking in Godot.
1. Using typeof()
typeof(obj) checks basic types like int, float, String, Vector2, Color, etc.
Example:
print(typeof(5))  # Prints: 2 (int)
print(typeof(Color()))  # Prints: 20 (Color)
2. Using is to Check for Node-Based Objects
To check if something is a Node, we use keywork is to check if an object is a certain type:
var my_node = Node2D.new()
print(my_node is Node)  # Prints: true
print(my_node is Color)  # Prints: false
We can use is to help prevent us from calling get_property_list() on non-Node objects by wrapping the statements in an if obj is obj check. Updated function below
func get_obj_properties(obj):
	if obj is Node:
		var properties = obj.get_property_list()

		var numbers = []
		var strings = []
		var bools = []
		var vectors = []
		var colors = []
		var objects = []
		var arrays = []
		var nil = []

		var type_lookup = {
			0: "Nil", 1: "bool", 2: "int", 3: "float", 4: "String", 5: "Vector2", 6: "Vector2i",
			7: "Rect2", 8: "Rect2i", 9: "Vector3", 10: "Vector3i", 11: "Transform2D", 12: "Vector4",
			13: "Vector4i", 14: "Plane", 15: "Quat", 16: "AABB", 17: "Basis", 18: "Transform3D",
			19: "Projection", 20: "Color", 21: "StringName", 22: "NodePath", 23: "RID", 24: "Object",
			25: "Callable", 26: "Signal", 27: "Dictionary", 28: "Array", 29: "PackedByteArray",
			30: "PackedInt32Array", 31: "PackedInt64Array", 32: "PackedFloat32Array", 33: "PackedFloat64Array",
			34: "PackedStringArray", 35: "PackedVector2Array", 36: "PackedVector3Array", 37: "PackedColorArray"
		}


		for prop in properties:
			var type_name = type_lookup.get(prop.type, "Unknown")

			if prop.type in [1]:
				bools.append(prop.name + " - Type: " + type_name)
			elif prop.type in [2, 3]:  # bool, int, float
				numbers.append(prop.name + " - Type: " + type_name)
			elif prop.type in [4, 21]:
				strings.append(prop.name + " - Type: " + type_name)
			elif prop.type in [5, 6, 7, 8, 9, 10, 11, 12, 13, 14, 15, 16, 17, 18, 19]:  # Vector types & transforms
				vectors.append(prop.name + " - Type: " + type_name)
			elif prop.type in [20]:  # Colors
				colors.append(prop.name + " - Type: " + type_name)
			elif prop.type in [22, 23, 24, 25, 26]:  # Node and object references
				objects.append(prop.name + " - Type: " + type_name)
			elif prop.type in [27, 28, 29, 30, 31, 32, 33, 34, 35, 36, 37]:  # Arrays and dictionaries
				arrays.append(prop.name + " - Type: " + type_name)
			else:
				nil.append(prop.name + " - Type: " + type_name)


		print("Numbers:")
		for entry in numbers:
			print(entry)

		print("\nStrings:")
		for entry in strings:
			print(entry)

		print("\nBools:")
		for entry in bools:
			print(entry)

		print("\nVectors:")
		for entry in vectors:
			print(entry)

		print("\nColors")
		for entry in colors:
			print(entry)

		print("\nObjects:")
		for entry in objects:
			print(entry)

		print("\nArrays:")
		for entry in arrays:
			print(entry)

		print("\nNil")
		for entry in nil:
			print(entry)

	else:
		print("'/obj'/ passed was not a Node")
3. Using sort to alphabetically sort the lists
sort() is a built in function that can be used with all lists by calling the list.sort()
...
			else:
				nil.append(prop.name + " - Type: " + type_name)

		numbers.sort()
		strings.sort()
		bools.sort()
		vectors.sort()
		colors.sort()
		objects.sort()
		arrays.sort()
		nil.sort()

		print("Numbers:")
		for entry in numbers:
			print(entry)
...
Step 4: Refactoring to Return Data Instead of Printing
Now that we’ve organized properties into groups and sorted them alphabetically, the next step is to return the data instead of printing it directly.
Why We Need to Refactor
Right now, our function immediately prints the results, making it inflexible .
Current Behavior (Direct Printing)
print("Numbers:")
for entry in numbers:
    print(entry)
The function forces output into the console, meaning we cannot reuse the data elsewhere.
Updated Behavior (Returning Data)
Instead of printing:
return sorted_obj_prop_dict
Now, we can store the results in a variable and use them later:
var data = get_obj_properties(self)
print(data["numbers"])  # Now we can choose when to print
Step 1: Updating the Function to Return Data
Here’s the updated code that returns a dictionary instead of printing:
extends Node2D

var type_lookup: Dictionary = {
			0: "Nil", 1: "bool", 2: "int", 3: "float", 4: "String", 5: "Vector2", 6: "Vector2i",
			7: "Rect2", 8: "Rect2i", 9: "Vector3", 10: "Vector3i", 11: "Transform2D", 12: "Vector4",
			13: "Vector4i", 14: "Plane", 15: "Quat", 16: "AABB", 17: "Basis", 18: "Transform3D",
			19: "Projection", 20: "Color", 21: "StringName", 22: "NodePath", 23: "RID", 24: "Object",
			25: "Callable", 26: "Signal", 27: "Dictionary", 28: "Array", 29: "PackedByteArray",
			30: "PackedInt32Array", 31: "PackedInt64Array", 32: "PackedFloat32Array", 33: "PackedFloat64Array",
			34: "PackedStringArray", 35: "PackedVector2Array", 36: "PackedVector3Array", 37: "PackedColorArray"
		}

func _ready():
	for x in get_obj_properties(self)["numbers"]:
		print(x)


func get_obj_properties(obj):
	if obj is Node:
		var properties = obj.get_property_list()

		var numbers = []
		var strings = []
		var bools = []
		var vectors = []
		var colors = []
		var objects = []
		var arrays = []
		var nil = []


		for prop in properties:
			var type_name = type_lookup.get(prop.type, "Unknown")

			if prop.type in [1]:
				bools.append(prop.name + " - Type: " + type_name)
			elif prop.type in [2, 3]:  # bool, int, float
				numbers.append(prop.name + " - Type: " + type_name)
			elif prop.type in [4, 21]:
				strings.append(prop.name + " - Type: " + type_name)
			elif prop.type in [5, 6, 7, 8, 9, 10, 11, 12, 13, 14, 15, 16, 17, 18, 19]:  # Vector types & transforms
				vectors.append(prop.name + " - Type: " + type_name)
			elif prop.type in [20]:  # Colors
				colors.append(prop.name + " - Type: " + type_name)
			elif prop.type in [22, 23, 24, 25, 26]:  # Node and object references
				objects.append(prop.name + " - Type: " + type_name)
			elif prop.type in [27, 28, 29, 30, 31, 32, 33, 34, 35, 36, 37]:  # Arrays and dictionaries
				arrays.append(prop.name + " - Type: " + type_name)
			else:
				nil.append(prop.name + " - Type: " + type_name)

		numbers.sort()
		strings.sort()
		bools.sort()
		vectors.sort()
		colors.sort()
		objects.sort()
		arrays.sort()
		nil.sort()

		var sorted_obj_prop_dict = {"numbers": numbers, "strings": strings, "bools": bools,
		"vectors": vectors, "colors": colors, "objects": objects, "arrays": arrays, "nil": nil }

		return sorted_obj_prop_dict

	else:
		print("'/obj'/ passed was not a Node")
Why This Approach is Better
- Prevents Unnecessary Console Spam
- We only print when necessary , instead of forcing console output from the function.
- Improves Reusability
- Now,
get_obj_properties()can be used anywhere without needing console output. - We can store results for later use, send them to a UI , or log them to a file .
- Now,
- Better Error Handling
- The function returns a proper error message instead of crashing when an invalid object is passed.